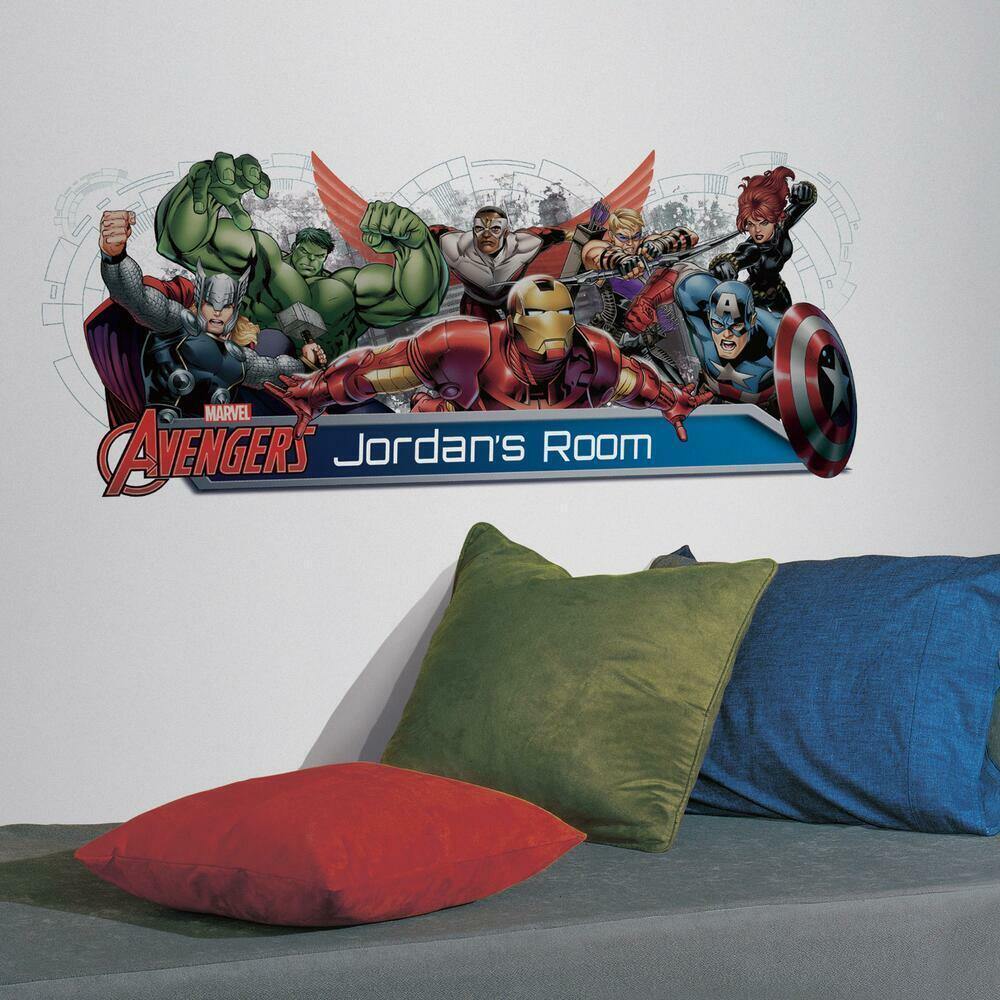
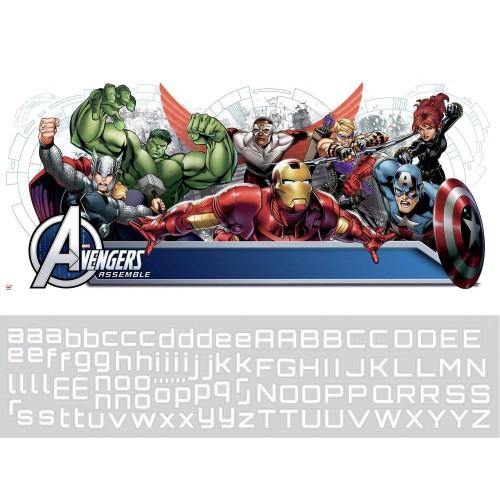
Avengers Assemble!
Delight your junior MARVEL fan with this action-packed and personalizable wall decal headboard. Apply the large wall decal to any wall or smooth surface, then stick on the included white letters to spell out your child's name, a favorite phrase, or whatever you please. All of the stickers are 100% removable and repositionable, and remove safely without damage or any unsightly residue. Pair this headboard design with any of our other Avengers Assemble designs to put the finishing touch on your child's super hero room.
This product is printed on clear material for a "stenciled" look. White or light colored walls are recommended for best results.
DIMENSIONS:
Decals range from .3 inch x 35 inches to 39 inches x 16.75 inches
Wall decals application is meant to be simple. Always remember, just peel and stick! Your wall sticker sheets may also include numbers (depending on the complexity of the design) next to each cut out wall decal to help guide you to build your decal and know which sticker to place on the wall first, second, third and so on. Follow our guide below as we walk you through the steps of how to apply wall decals.

A STEP BY STEP GUIDE ON HOW TO APPLY WALL DECALS
 |
 |
 |
STEP 1
|
STEP 2
|
STEP 3
|
|
Your RoomMates wall decals will arrive printed on one or more sheets and packaged in a protective plastic shell. Open the packaging and remove the sheets. Spread them out on a flat surface near your desired location of application.
|
Peel the first decal from the sheet. It should remove easily from the liner. If handling a large design, consider recruiting a second person to hold the opposite end of your decal so that the two sides do not stick together.
|
Bring the decal to the wall. Slowly smooth the design from top to bottom, pressing down firmly. Ensure that the entire decal makes contact with the wall or surface, and that no air bubbles are trapped beneath the sticker.
|
 |
 |
 |
STEP 4
|
STEP 5
|
STEP 6
|
|
Examine the placement of your wall decal. If the applied element needs to be moved, simply peel it away from the wall and re-apply. The decal will remove and re-apply easily regardless of how many times this process is repeated |
Repeat steps 2-4 until you have applied all included wall decals, or (if you are assembling a large design from multiple pieces) completed the application of your giant wall decal.
|
If you need to move your decals, simply peel them away from the wall and place them back on their liners (or wax paper). Roll up the sheets and store them somewhere safe until they are needed again.
|
WHAT EXACTLY ARE WALL DECALS?
Wall decals—also known as wall stickers, wall graphics, wall appliques, and even wall clings are typically very thin sheets of vinyl with one printed side and one adhesive side. They stick flat to walls and other surfaces without the use of nails or glue.
Watch the short video below to see how our wall decals work, and how easy it is to decorate with them.
WHERE ARE ROOMMATES WALL DECALS MADE?
RoomMates wall decals are proudly made in the United States, except where otherwise noted.
WHAT MAKES ROOMMATES WALL DECALS SO SPECIAL?
Traditional wall stickers use a sticky backing that bonds to paint or smooth surfaces. When these wall stickers are removed, some of the backing is left behind in the form of a sticky residue—or you may even find that some of the paint comes off, too. Yikes!
RoomMates wall decals use a special adhesive that grips the wall tightly but won't form a bond. When the sticker is removed, it lifts easily from the wall without residue or damage. This technology also allows the decals to be used again at a new location without reducing the quality of their performance.
SAFETY & CLEANING
ARE ROOMMATES SAFE FOR KIDS?
Decorate with confidence knowing that RoomMates wall decals (and peel and stick wallpaper) is free of harmful chemicals like phthalates and lead, making it safe to use in your personal space.
We want you to feel safe with RoomMates in your home, so we’re regularly undergoing new tests to ensure that each and every one of our products remain safe for children (and adults) to decorate with. If you’d like more information on our current safety standards, or to request specific test results, please contact us. Please note for young children, keep product or decorations away from cribs to prevent choking hazard.
ARE THERE ANY FLAME RETARDANTS ADDED TO ROOMMATES PRODUCTS?
There are no flame resistance or flame retardants added to RoomMates products.
IS THERE LATEX IN THE DECALS? WE HAVE AN INDIVIDUAL WHO IS ALLERGIC TO LATEX.
Our wall decals do not contain latex. We too are very concerned with our products safety, which is why we’re regularly undergoing new tests to ensure that each and every one of our products remain safe for children (and adults) to decorate with. Decorate with confidence knowing that RoomMates wall decals (and peel and stick wallpaper) is free of harmful chemicals like phthalates and lead, making it safe to use in your personal space. Our products are made of vinyl using a polymeric plasticizer not a phthalate.They are fully CPSIA-compliant, and have undergone many rigorous safety and regulatory tests.
CAN I CLEAN MY WALL DECALS?
A slightly damp cloth and a little hand soap should do the trick for removing any dirt, dust, or other substances that may end up on your wall decals.
We do NOT recommend spraying any chemicals on or around your RoomMates. Direct contact or prolonged exposure could cause bubbling, running, streaking, or fading.
REMOVAL
HOW DO I REMOVE MY WALL DECALS?
We take pride in the fact that our wall decals are removable! Removal is just as easy as application. To remove, start at a corner and slowly peel the decal from the wall or surface, moving toward the center of the wall decal until it is free from the wall. Pulling too hard, too fast may cause your wall decal to stretch.
HOW DO I STORE MY WALL DECALS IF I WANT TO SAVE THEM FOR LATER?
If there's a possibility that you'll need to remove your RoomMates, either to move them to a new location or to save them for re-use at a later date, we recommend saving the liners that come in the original packaging. You can re-apply the decals to the liners, roll them up, and store them wherever you please.
In lieu of the original liners, wax or parchment paper also works very well for this purpose.
INSTALLATION
Check out our blog for detailed installation instructions available here